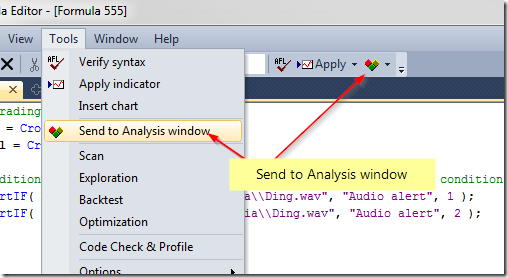
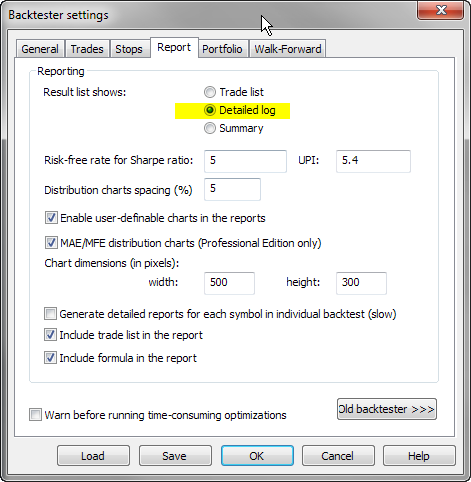
Apart from testing mechanical rules based on indicator readings, backtester can also be used to generate all statistics based on a list of pre-defined trades, list of our real trades from the past or a list of trades generated from another software.
To achieve that, first we need to create an input information for AmiBroker where it could read the trades from. A convenient way would be to use an input file in text format, which could store information about trades, including the type of transaction (buy or sell), dates and position sizes. A sample input file may look like this:
Symbol,Trade,Date,Price,Shares
AAME,Buy,2000-04-06,2.66,375.94
AAME,Buy,2000-04-10,2.66,378.922
AAPL,Buy,2000-04-27,31.23,32.0862
AAON,Buy,2000-04-06,3.19,313.48
ABAX,Buy,2000-04-26,7.67,132.101
AB,Buy,2000-04-25,20.23,50.0337
A,Buy,2000-04-27,84.66,11.8362
AAME,Buy,2000-05-10,2.6,373.627
ABCB,Buy,2000-05-11,6.08,159.406
A,Buy,2000-05-15,82.27,11.736
AAON,Buy,2000-05-18,3.84,246.242
AB,Buy,2000-05-15,20.84,46.3303
ABAX,Buy,2000-05-18,5.84,161.913
ABCB,Buy,2000-05-15,6.08,158.803
AAME,Buy,2000-05-19,2.6,363.763
AB,Buy,2000-06-05,22.78,43.3501
ABC,Buy,2000-05-18,4.49,210.595
We can read and backtest such input with the formula presented below. It is important to remember that this particular code can work with input files of identical format (columns in identical order, signals specified with exact Buy / Sell words, position sizes specified as shares). Changing the input format would also require to update the formula to match the input.
Path to the file is specified in the very first line (note that double backslashes need to be used).
The formula reads the file line by line, then on a bar with matching date/time it generates a new Buy or Sell signal that is then combined with existing signals (coming from other bars).
file = "C:\\TEMP\\trades.csv"; // change this to real location of your data file
dt = DateTime();
//
// Initialize variables
Buy = Sell = possize = 0;
//
fh = fopen( file, "r" );
//
if( fh )
{
while( ! feof( fh ) )
{
line = fgets( fh );
// get the ticker symbol from the file
sym = StrExtract( line, 0 );
// if ticker matches current symbol
if ( Name() == sym )
{
// extract data from line of text
trade = StrExtract( line, 1 );
trade_datetime = StrToDateTime( StrExtract( line, 2 ) );
price = StrToNum( StrExtract( line, 3 ) );
shares = StrToNum( StrExtract( line, 4 ) );
//
if ( trade == "Buy" )
{
newbuy = dt == trade_datetime;
Buy = Buy OR newbuy; // combine previous buy signals with new
BuyPrice = IIf( newbuy, price, BuyPrice );
possize = IIf( newbuy, shares, possize );
}
//
if ( trade == "Sell" )
{
newsell = dt == trade_datetime;
Sell = Sell OR newsell; // combine previous sell signals with new
SellPrice = IIf( newsell, price, SellPrice );
}
}
}
//
fclose( fh );
}
else
{
Error( "ERROR: file can not be open" );
}
//
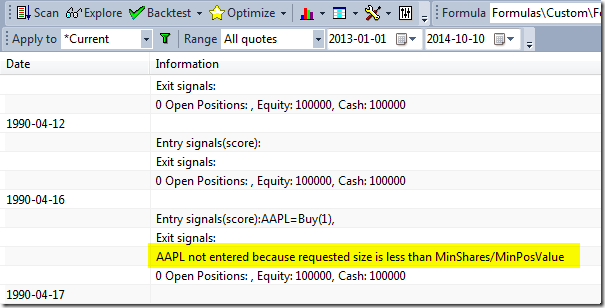
SetPositionSize( possize, spsShares );